Virtual Privaate Networking (VPN) is technology which allows to access your private network (in our case RUPC cluster) accross the public network using private IP addresses. OpenVPN is open source VPN project which supports majour operating systems for free.
Each operating system (in our case Windows, MAC OS X and Linux) has a program
which supports OpenVPN. Regardless operating sydstem (OS) in order to configure OpenVPN, administrator will provide you with configuration file having .ovpn extension.
The configuration file for an OpenVPN client tells the client machine how to connect to the server and provides all necessary credentials.
Ask your administrator for the configuration file .ovpn.
Windows
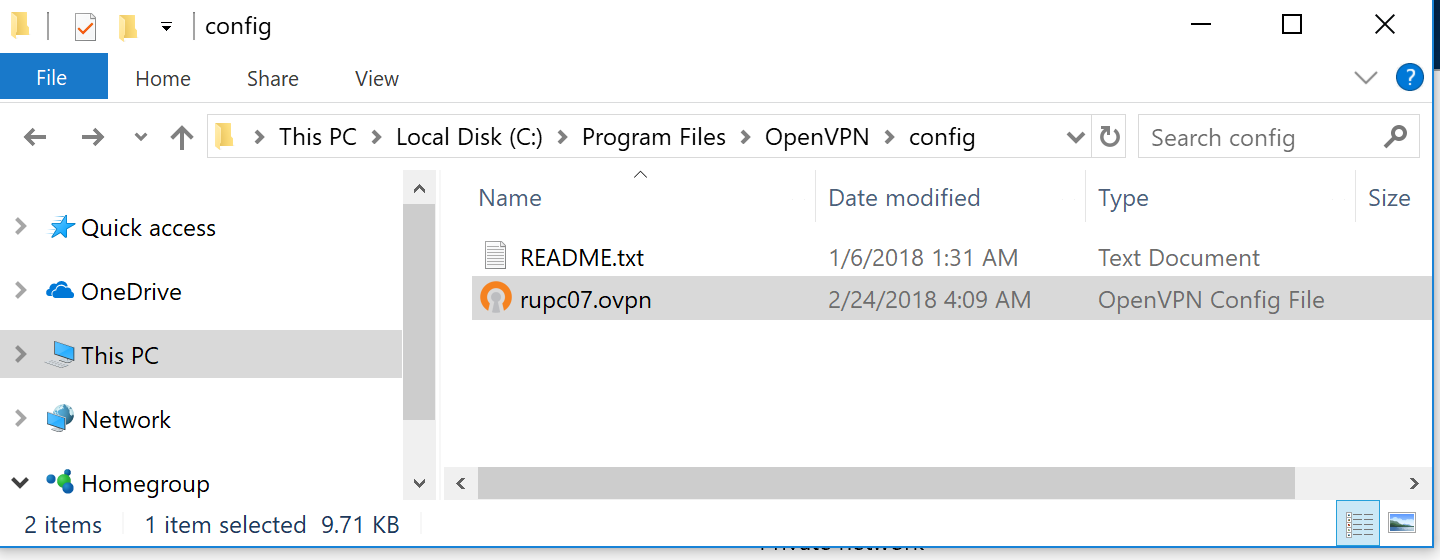
On Windows, you will need the official OpenVPN Community Edition binaries which come with a GUI. Next, obtain your configuration file from your network administrator and place .ovpn configuration file into the proper directory, C:\Program Files\OpenVPN\config
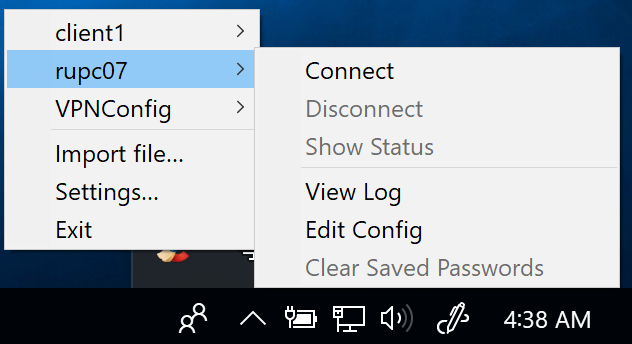
and right click on GUI icon in the right windows corner
and click Connect in the GUI for chosen configuration (rupc-01 in the image below).
OpenVPN GUI on Windows must be executed with administrative privileges.
Mac OS X
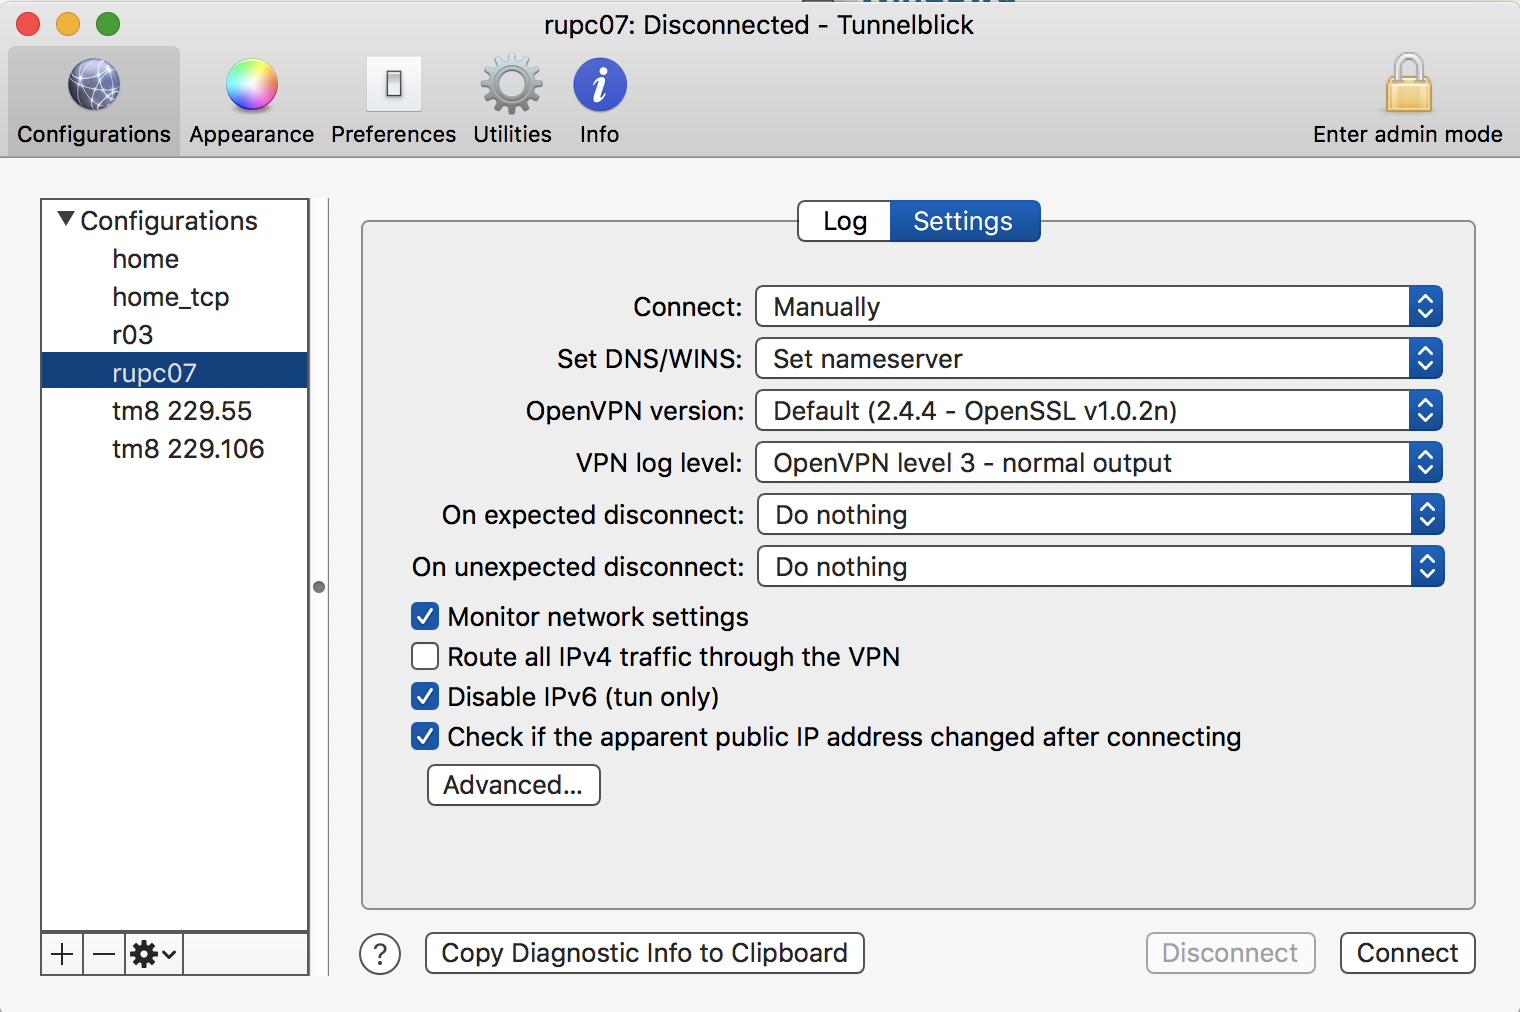
On Mac OS X, the open source application Tunnelblick provides an interface similar to the OpenVPN GUI on Windows, and comes with OpenVPN and the required TUN/TAP drivers.
Download Tunnelblick app and install it.
As with Windows, the only step required is to place your .ovpn configuration file into the ~/Library/Application
Support/Tunnelblick/Configurations directory. Or, you can double-click on your .ovpn file or you can start the application, and drag and drop configuration file (.ovpn) on the Tunnelblick icon in the menu bar or on the list of configurations in the 'Configurations' tab of the 'VPN Details' window.
To install multiple configuration files at one time, select all the files and then drag and drop all of them.
The configuration file .ovpn is supplied to you by your network manager or VPN service provider.
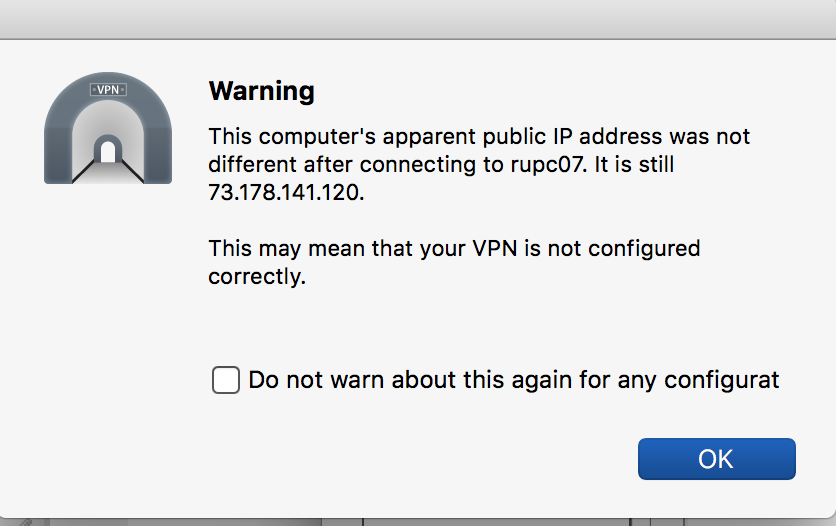
After finishing "Authorization" and "Getting configuration" stages you finally should see green message "Connected" like on the image below for rupc-01 connection.
Disregard the warning below and click "OK".
To disconnect from the server use "Disconnect" button the Connection status window.
Linux
On Linux, if it is not already done, you should install OpenVPN from your distribution's official repositories.
For CentOS 7 Linux the installation command is
You can then start OpenVPN by executing the following command:
sudo openvpn --config ./rupc-01.ovpn
The configuration file (rupc-01.ovpn in the current example) should be obtained from your local network administrator.
Mon Feb 26 02:56:40 2018 OpenVPN 2.4.4 x86_64-redhat-linux-gnu [Fedora EPEL patched] [SSL (OpenSSL)] [LZO] [LZ4] [EPOLL] [PKCS11] [MH/PKTINFO] [AEAD] built on Sep 26 2017
Mon Feb 26 02:56:40 2018 library versions: OpenSSL 1.0.2k-fips  26 Jan 2017, LZO 2.06
Mon Feb 26 02:56:40 2018 WARNING: No server certificate verification method has been enabled.  See http://openvpn.net/howto.html#mitm for more info.
Mon Feb 26 02:56:40 2018 Outgoing Control Channel Authentication: Using 160 bit message hash 'SHA1' for HMAC authentication
Mon Feb 26 02:56:40 2018 Incoming Control Channel Authentication: Using 160 bit message hash 'SHA1' for HMAC authentication
Mon Feb 26 02:56:40 2018 TCP/UDP: Preserving recently used remote address: [AF_INET]128.6.224.217:51194
Mon Feb 26 02:56:40 2018 Socket Buffers: R=[212992->212992] S=[212992->212992]
Mon Feb 26 02:56:40 2018 UDP link local: (not bound)
Mon Feb 26 02:56:40 2018 UDP link remote: [AF_INET]128.6.224.217:51194
Mon Feb 26 02:56:40 2018 TLS: Initial packet from [AF_INET]128.6.224.217:51194, sid=631fd281 abdd7cf8
Mon Feb 26 02:56:40 2018 VERIFY OK: depth=1, C=US, ST=NJ, L=Piscataway, O=Rutgers University, OU=Department of Physics and  Astronomy, CN=Easy-RSA CA, [email protected]
Mon Feb 26 02:56:40 2018 VERIFY OK: depth=0, C=US, ST=NJ, L=Piscataway, O=Rutgers University, OU=Department of Physics and  Astronomy, CN=rupc-01, [email protected]
Mon Feb 26 02:56:40 2018 Control Channel: TLSv1.2, cipher TLSv1/SSLv3 ECDHE-RSA-AES256-GCM-SHA384, 2048 bit RSA
Mon Feb 26 02:56:40 2018 [rupc-01] Peer Connection Initiated with [AF_INET]128.6.224.217:51194
Mon Feb 26 02:56:41 2018 SENT CONTROL [rupc-01]: 'PUSH_REQUEST' (status=1)
Mon Feb 26 02:56:41 2018 PUSH: Received control message: 'PUSH_REPLY,dhcp-option DNS 8.8.8.8,dhcp-option DNS 8.8.4.4,route 10.10.10.0 255.255.255.0,route 10.7.0.1,topology net30,ping 20,ping-restart 60,ifconfig 10.7.0.14 10.7.0.13,peer-id 2,cipher AES-256-GCM'
Mon Feb 26 02:56:41 2018 OPTIONS IMPORT: timers and/or timeouts modified
Mon Feb 26 02:56:41 2018 OPTIONS IMPORT: --ifconfig/up options modified
Mon Feb 26 02:56:41 2018 OPTIONS IMPORT: route options modified
Mon Feb 26 02:56:41 2018 OPTIONS IMPORT: --ip-win32 and/or --dhcp-option options modified
Mon Feb 26 02:56:41 2018 OPTIONS IMPORT: peer-id set
Mon Feb 26 02:56:41 2018 OPTIONS IMPORT: adjusting link_mtu to 1625
Mon Feb 26 02:56:41 2018 OPTIONS IMPORT: data channel crypto options modified
Mon Feb 26 02:56:41 2018 Data Channel: using negotiated cipher 'AES-256-GCM'
Mon Feb 26 02:56:41 2018 Outgoing Data Channel: Cipher 'AES-256-GCM' initialized with 256 bit key
Mon Feb 26 02:56:41 2018 Incoming Data Channel: Cipher 'AES-256-GCM' initialized with 256 bit key
Mon Feb 26 02:56:41 2018 ROUTE_GATEWAY 10.211.55.1/255.255.255.0 IFACE=eth0 HWADDR=00:1c:42:82:37:5a
Mon Feb 26 02:56:41 2018 TUN/TAP device tun0 opened
Mon Feb 26 02:56:41 2018 TUN/TAP TX queue length set to 100
Mon Feb 26 02:56:41 2018 do_ifconfig, tt->did_ifconfig_ipv6_setup=0
Mon Feb 26 02:56:41 2018 /sbin/ip link set dev tun0 up mtu 1500
Mon Feb 26 02:56:41 2018 /sbin/ip addr add dev tun0 local 10.7.0.14 peer 10.7.0.13
Mon Feb 26 02:56:41 2018 /sbin/ip route add 10.10.10.0/24 via 10.7.0.13
Mon Feb 26 02:56:41 2018 /sbin/ip route add 10.7.0.1/32 via 10.7.0.13
Mon Feb 26 02:56:41 2018 WARNING: this configuration may cache passwords in memory -- use the auth-nocache option to prevent this
Mon Feb 26 02:56:41 2018 Initialization Sequence Completed
Just for your information we provide output from ifconfig and route
commands. Keep in mind that for the example below outputs of those commands were obtained on a virtual machine (it exaplains some extra interfaces and routes in comparison with a standard Linux box).
Kernel IP routing table
Destination     Gateway         Genmask         Flags Metric Ref    Use Iface
default         gateway         0.0.0.0         UG    100    0        0 eth0
10.7.0.1        10.7.0.13       255.255.255.255 UGH   0      0        0 tun0
10.7.0.13       0.0.0.0         255.255.255.255 UH    0      0        0 tun0
10.10.10.0      10.7.0.13       255.255.255.0   UG    0      0        0 tun0
10.211.55.0     0.0.0.0         255.255.255.0   U     100    0        0 eth0
192.168.122.0   0.0.0.0         255.255.255.0   U     0      0        0 virbr0
What next?
Upon installation and configuration of the OpenVPN client you are ready to connect to the cluster. Please start the OpenVPN programm and connect to the network. To connect to RUPC you will need to use PRIVATE network: 192.168.201.211
From Linux terminal, or MAC OS X terminal you should use the the following command:
ssh -l your-rupc-username 192.168.201.211 .
On Windws computer depending on a program which you use for SSH connection (most commonly it is Putty) you can use your rupc username and 192.168.201.211 IP in the corresponsing fields.
We hope the instllation and connection process will be easy and problemless for you.
If you meet any unresolvable problems with it please let me know by E-mail
If VPN doesn't Work
Please, do NOT use public IP which includes name rupc-01, instead use private IP, which looks like 192.168.201.211.
In short, use the following command to access the cluster:
ssh -l your-rupc-username 192.168.201.211.